Before selecting finishes, clarify the condition of the property, the work that is actually required, the level of intervention, the decisions that must be made early and the parts of the existing architecture worth preserving.
Existing conditions before aesthetics
Walk the building before you shop for it. Structure, moisture, electrical service, plumbing age and roof condition set the true floor of the budget, and every one of them is cheaper to find now than after demolition. A renovation that begins with a finish schedule usually ends with a change order.
Define what must change
Separate what genuinely does not work from what is simply dated. A kitchen that cooks badly is a plan problem; a kitchen you have stopped liking is a finish problem. They cost very different amounts to solve, and confusing them is the most common way a renovation runs away.
Identify what should remain
Older buildings usually contain something worth keeping — a stair, a fireplace, plaster, a window proportion, a floor that will never be milled that way again. Decide what stays before the crew arrives, because nothing is easier to lose in a demolition week.
Establish an investment framework
A range is enough to begin; a number is not required. What matters is that scope and investment are agreed before drawings develop, so the design is built for the budget rather than value-engineered down to it afterward.
Plan for hidden infrastructure
HVAC runs, structural headers, waste lines and electrical panels decide what a plan can actually do. Ceilings drop, soffits appear and islands move because of things nobody can see. Getting these coordinated during design is what keeps the built room faithful to the drawing.
Understand long-lead decisions
Stone slabs, custom millwork, imported tile, appliances and windows can run months, and they often need to be selected before anything visible has happened. The decisions that feel earliest are usually the ones the schedule depends on.
Know when documentation is complete enough to build
Building from an incomplete set transfers every unanswered question to the job site, where it gets resolved by whoever is standing there. Complete documentation is not bureaucracy; it is the mechanism that keeps the finished room equal to the design.
Decide who is responsible for what
Design, procurement, construction, and the coordination between them are four different jobs. Name who owns each one at the start — particularly on projects with more than one firm involved — and most disputes never happen.

The kitchen was measured and drawn before a single finish was chosen. Working over the existing conditions is what made the hood, the niches and the range wall land exactly as drawn — and what surfaced the framing and ventilation problems while they were still cheap to solve.
A beautiful space can still be the wrong space. Review the building, utilities, access, code implications, visibility, operational fit and required construction before committing to a lease.
Existing use + change of use
A space built for retail does not automatically become a restaurant, a clinic or a studio. Changing occupancy classification can trigger requirements — exiting, ventilation, plumbing fixture counts — that cost more than the build-out itself.
Power, HVAC, plumbing + infrastructure
Verify the service that is actually there, not what the listing implies. Electrical capacity, existing tonnage, gas availability and where the waste line sits will determine whether your floor plan is possible or merely attractive.
Accessibility + life safety
Restrooms, door clearances, thresholds, exit paths and alarm systems are the least glamorous line items and the least negotiable. They should be understood before the lease, because they cannot be designed away afterward.
Landlord work vs tenant work
Read exactly where the landlord’s obligation ends. “Warm shell” means different things in different markets, and the gap between what is delivered and what you assumed is paid for by you.
Signage + exterior identity
Confirm what the landlord, the municipality and any tenant association will actually permit before you build a brand around it. Sign area, illumination, placement and material are usually regulated, sometimes tightly.
Delivery + service access
Where deliveries land, where trash goes, where staff park and how equipment gets in are operational realities that shape a plan. A beautiful room with no back-of-house route will be fought daily by the people working in it.
Schedule realities
Permitting, landlord approvals, long-lead equipment and inspection sequencing all run on their own clock. Rent frequently begins before a business can open; know that number before signing.
Improvement allowance + construction responsibility
A tenant improvement allowance is a negotiation, not a fixed figure — and how it is disbursed matters as much as its size. Establish who holds the contract, who carries the risk, and when funds are actually released.
Brand experience vs operational reality
The space has to express the business and let it run. Where those conflict, resolve it on paper. A concept that cannot be operated will be quietly dismantled by staff within a year.
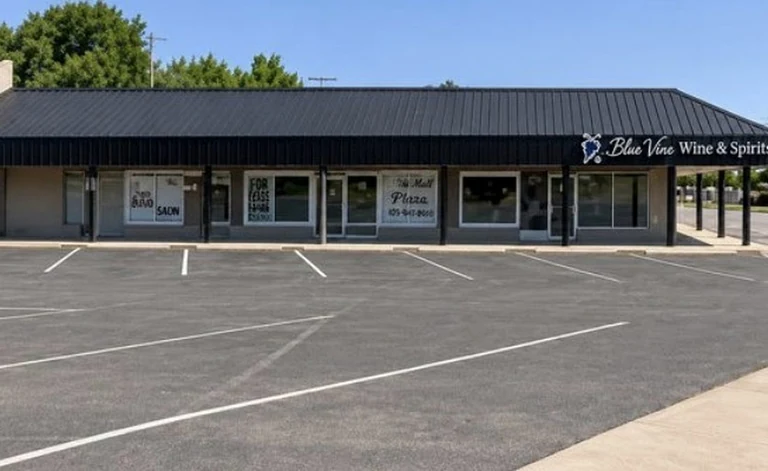
The tenancy came with mismatched signage, an inherited storefront and a facade that had been added to for years. Reviewing what could and could not be changed — and what the landlord and city would permit — came before any concept work.
Integrated lighting, automated shades, security, access, network, AV, climate and water protection require infrastructure that is far easier to coordinate during design than after finishes are complete.
Decide what should be visible
Every system has a visible portion — a keypad, a thermostat, a speaker, a camera. Decide early which of those you want to see and which should disappear, because concealment is a framing and millwork decision, not a device decision.
Network before devices
The network is the foundation everything else stands on. Plan coverage, access point locations and wired runs first; a beautiful integrated house on a weak network is an unreliable one.
Power + low-voltage planning
Low-voltage runs are pulled before drywall and are painful to add afterward. Even systems you are not installing yet should have their pathways provided, because conduit is cheap and demolition is not.
Shade pockets + window integration
A concealed shade requires a pocket framed at rough-in, coordinated with the ceiling, the header and the drapery. Decided late, it becomes a surface-mounted roller and a visible fascia — the exact thing you were trying to avoid.
Lighting control locations
Keypads should sit where a hand naturally reaches, sized to the plate and grouped so a guest can read the room. Scene programming matters less than putting the right control at the right door.
Security + access points
Camera angles, lock hardware, intercom placement and gate control should be set against the floor plan and the door schedule, so finishes match and nothing is surface-mounted as an afterthought.
Leak detection + shutoff strategy
Sensors at every wet wall and an automatic shutoff at the main are among the least expensive systems in the house and prevent the most expensive failure. Add freeze monitoring on exterior runs and the alert reaches a phone before it reaches a ceiling.
Equipment locations + ventilation
Racks generate heat and need air, service access and a home that is not a closet in a bedroom wall. Locate and ventilate them during design.
Plan for serviceability
Someone who did not install the system will eventually maintain it. Labelled runs, documented configurations and reachable equipment are what keep a system alive after the original integrator moves on.
Future expansion
You do not have to install everything at once, but you should preserve the option. Pathways, capacity and a coherent architecture let systems be phased over years instead of rebuilt.

The halo behind the monogram, the entry glow and the interior wash were drawn with the elevation rather than added to it. Every driver, run and control location was resolved before the facade was closed, which is why nothing about the system is visible in the finished building.